


Ultimate Guide-What to Do When You Lost Android Data
Efficient Android Data Recovery Guide
Discover the essential steps and expert tips for recovering lost data on your Android device. Whether it’s photos, contacts, messages, or files, this comprehensive guide will walk you through data recovery to get your precious information back in no time.
Android Device Data Recovery Importance
The Significance of Android Data Recovery Tools
With over 2.5 billion people using Android smartphones worldwide, these devices have become a big part of our lives. Android is popular, with about 70.94% of all mobile phones. Since so many people use Android phones, the data saved on these phones is valuable. This includes things like special memories and important information.
Having a reliable Android data recovery tool is very important in this situation. These tools help you regain your lost data if you accidentally delete it, your phone stops working correctly, updates mess up your phone, you erase everything on your phone without backing it up first, or even if your phone’s hardware breaks.
This comprehensive manual is designed to furnish detailed remedies and procedures in case of data loss on your Android device.
Part 1. Preparing for Data Loss
Safeguarding your data against loss entails regular backups as the optimal strategy. Utilizing Google Account backups and third-party backup tools are the primary methods to secure your Android data.
Google Account Backups:
Google Account backups provide a convenient means of securing your data if you are a user of Google services like Gmail, Google Drive, and Google Photos.
These backups typically encompass your contacts, calendar events, app data, and device configurations. To engage Google Account backups:
On Android devices, navigate to “Settings” > “System” > “Backup” to activate automatic backups to your Google Account.
For iOS devices, you can safeguard your Google data by installing the Google Drive app and enabling backups within the application.
Third-Party Backup Solutions:
Third-party backup solutions provide broader backup alternatives for diverse devices and data categories.
Enhancing Data Backup Solutions
Utilizing Third-Party Services
These solutions encompass dedicated backup software or cloud-based services from providers like iCloud (for Apple devices), Dropbox, or Microsoft OneDrive. To engage third-party backup solutions:
- Select a reputable provider and adhere to their setup guidelines.
- Confirm that your chosen solution safeguards the data and devices you wish to secure.
- Configure automated backups to maintain continuous data protection.
- Third-party options commonly provide versatility, cross-platform compatibility, and the capacity to back up various file types including photos and videos.
- Assess your requirements to identify the most suitable solution for your needs.
Implementing Automated Backup Processes
Setting Up Automated Backups:
Automated backups guarantee consistent data protection without the need for manual oversight. Here are steps to establish automated backup routines:
- Identify the specific data for backup, like photos, documents, or system settings.
- Select an appropriate backup method, such as Google Account backups or a third-party solution.
- Set up backup preferences to run automatically at chosen intervals, be it daily or weekly.
- Activate automatic backup on your connected devices to ensure data safety.
Significance of Regular Data Sync:
Data synchronization guarantees uniformity of data across various devices and backup locations. Consistent synchronization is essential due to the following reasons:
Enhanced Accessibility
Synced data can be retrieved from any authorized device, providing flexibility and convenience.
Data Integrity
Synchronization aids in averting inconsistencies and conflicts when multiple devices access identical data.
Disaster Recovery
Disaster recovery: If a device or backup location malfunctions, synchronized data on other devices or backups remains intact.
To ensure data synchronization:
- Utilize cloud storage services with automatic synchronization support.
- Activate synchronization features in applicable apps and services.
- Regularly monitor synchronization status to uphold data consistency.
Part 2: Steps to Take Immediately
Before you recover Android data, consider these immediate actions:
Stay Calm and Assess the Situation:
Remaining composed during data loss is crucial as panic can exacerbate the problem. Take a moment to breathe deeply and approach the issue systematically for effective resolution.
Ensure Data Accessibility:
Check if Data is Temporarily Inaccessible:
Verify Temporary Data Accessibility:
Here are steps to confirm data accessibility:
- Rebooting the Device:
A simple device reboot can rectify sudden data inaccessibility.
Rebooting can resolve transient glitches affecting data access.
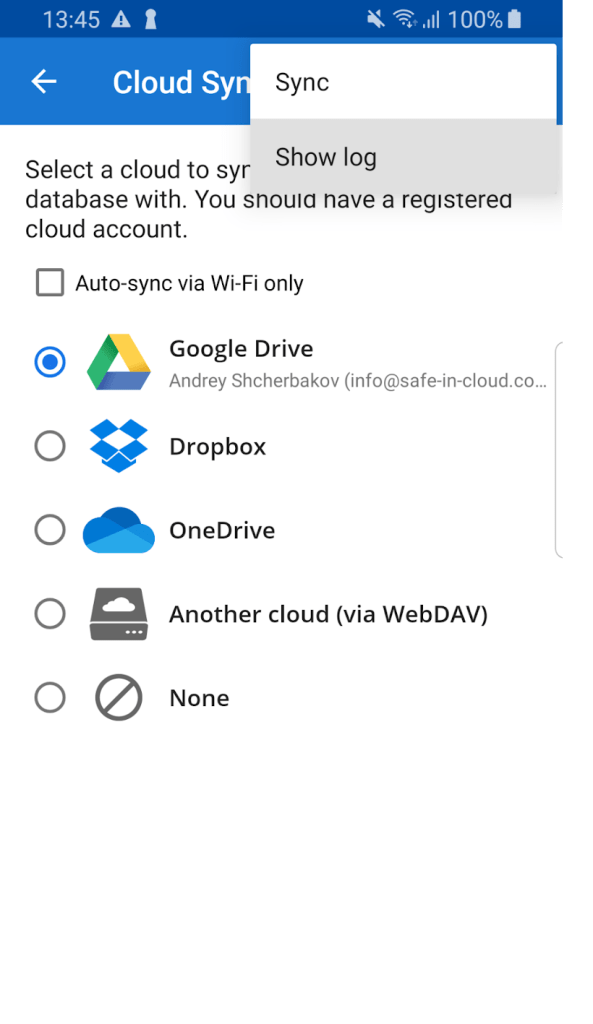
- Verifying Cloud Sync Status:
For cloud storage users, check your cloud account status. Follow these steps to verify sync status:
- Access the cloud app on your device.
- Confirm login and internet connection.
- Check file synchronization for accuracy.
Evaluating Data Loss Scope:
After ruling out temporary issues, assess data loss extent. Identify affected and intact data or files.
Assessment for Understanding the Severity
This evaluation aims to provide insight into the seriousness of the circumstances and the necessary steps to be taken.
Avoiding Actions That Could Aggravate the Problem
Avoiding actions that may escalate the issue:
It is vital to refrain from any actions that might exacerbate the data loss scenario.
-
Don’t try risky data retrieval methods:
Unless skilled in Android data retrieval, avoid DIY techniques that could worsen data loss. Sometimes, professional services are essential. -
Avoid hardware disassembly:
If data loss stems from a physical storage device issue, refrain from opening or fixing it independently. Consult professionals to prevent further harm. -
Avoid unnecessary software installs:
New software or unknown tools may disrupt data recovery. Only trust reputable and well-documented recovery tools if you opt for self-recovery attempts.
Part 3. Data Recovery Methods
There are various techniques and approaches for recovering lost Android data. Below are some of the methods:
A. Using Local Backup
Restoring Data from Manufacturer’s Backup:
Many phone manufacturers provide backup services to aid in data recovery. Here is a basic guide on how to restore data from a manufacturer’s backup:
- Access your device’s settings.
- Locate the “Backup and Reset” or similar settings, often found within “System” or “Accounts.”
- Click on “Backup” or “Backup and Restore.”
- Choose the manufacturer’s backup service.
- Log in using your account details.
- Pick the backup data for restoration.
- Follow the prompts on screen to begin the restore process.
Utilizing Android’s Native Backup and Restore Function:
Android features an integrated backup and restore function to aid in recovering device elements. Learn how to use it below:
Guidelines for Data Backup on Android Devices
Device Settings Backup
- Open your device’s settings.
- Scroll down and tap on “System” or “Accounts” (depending on your Android version).
- Select “Backup” or “Backup and Restore.”
- Ensure that “Back up my data” is enabled. This will automatically back up your app data, Wi-Fi passwords, and settings to your Google account.
Restoring Data on a New Device
Following the on-screen instructions during the initial setup process, restore your data on a new or factory-reset device. You’ll be prompted to restore from a previous backup.
B. Google Drive Restore
Restoring App Data and Settings:
Google Drive can be used to back up app data and settings. To restore this data, follow these steps:
- Ensure your device is connected to the internet.
- Launch the Google Drive app.
- Click on the three horizontal lines at the top-left for the sidebar.
- Navigate to “Backups” in the sidebar menu.
- Select the backup containing the desired app data and settings.
- Tap “Restore” and proceed with the provided instructions.
Accessing Multimedia Files:
While Google Drive emphasizes app data and settings, multimedia content like photos and videos is commonly backed up through Google Photos.
Here’s how you can access multimedia files from Google Photos:
Recovering Deleted Files in Google Photos
- Open the Google Photos app.
- Tap the three horizontal lines in the top-left corner to open the sidebar.
- Select “Trash” or “Bin.”
- Choose the multimedia files you wish to restore and click on “Restore.” This action will relocate the files to your primary Google Photos library.
C. Utilizing Third-Party Recovery Tools
When opting for third-party Android data recovery solutions, it is vital to conduct thorough research to select a reputable and trustworthy option. Dr.Fone is a leading software for data recovery on iPhone and Android devices, renowned for its exceptional data retrieval capabilities.
Here are some guidelines to assist you in evaluating and picking a reliable application:
-
Explore User Reviews and Ratings:
Check out the app store on your device for apps endorsed by positive reviews and high ratings from users. -
Conduct Online Investigation:
Browse through tech websites and forums for reviews and suggestions. Seek expert insights and user feedback on the app you intend to download. -
Account for Data Privacy:
Verify that the app you select upholds data privacy standards. Review their privacy policy to comprehend how your retrieved data will be managed and if it will be safeguarded.
Guidelines for Maximizing Data Recovery App Usage
After opting for a reliable data recovery tool such as Dr.Fone, follow these general steps to make the most of these applications:
Step 1: Open Wondershare Dr.Fone on your computer and navigate to Toolbox > Data Recovery.
Effortless Android Data Recovery Guide
Step 2: Select “Android” as your device type.

Simple Data Recovery Steps
Step 3: Choose “Recover Android Data“ from the available options.
The Complete Guide to Recovering Lost Android System Data
Step 4: Attach Your Android Device to Your PC
Connect your Android device to your PC using a cable and wait for it to be detected.
Step 5: Choose the types of files you wish to recover from your Android device and then press “Start Scan.”
Step 6: Allow the platform to scan and exhibit the restored data on the preview screen.
Step 7: Explore and pick out the desired data for recovery, then tap on “Recover” and designate the recovery location. Confirm the recovery operation when prompted.
Part 4. Contacting Experts
A. Knowing When to Consult Professionals:
In situations of data loss, understanding the right time to seek professional help is vital. While DIY methods may be effective for minor issues, certain circumstances necessitate the expertise of a professional data recovery service:
Physical Damage:
In case your storage device has encountered physical damage like a damaged hard drive or flash drive, trying to recover data on your own can exacerbate the situation. It is advisable to seek professional assistance without delay.
Data Issues and Recovery Services
Unrecognized or Inaccessible Data:
Encountering Unrecognized Data:
When your device fails to recognize or access your data, it may indicate a complex problem that demands professional expertise for recovery.
Deleted or Overwritten Files:
Dealing with Deleted Files:
In cases of deleted or overwritten files, immediate action to halt device usage is crucial to prevent further data loss. Skilled professionals utilize specialized methods for data retrieval.
Corrupted or Formatted Storage:
Data Corruption and Formatting Effects:
Data corruption or accidental formatting can lead to file inaccessibility. Experts possess the necessary tools to address such scenarios effectively.
B. Data Recovery Services and Considerations
Exploring the advantages and drawbacks of professional data recovery services.
Pros:
- Specialized Knowledge: Data recovery experts possess specialized expertise and tools to retrieve data from various storage media and situations.
- Success Rate: They demonstrate a notable success rate in their operations.
- Data Security: Ensuring data integrity is a priority for professionals during the recovery process.
- Efficient Recovery: Their data retrieval process is time-efficient, reducing downtime significantly.
Drawbacks:
- No Assurance: While experts achieve high success rates, there is no absolute guarantee of complete data recovery in every instance.
- Protection: Verify data security protocols and confidentiality policies.
- Expense: Obtain a clear cost estimate before proceeding with the recovery process.
Conclusion
In this detailed overview of Android data recovery, we have discussed crucial elements of data loss prevention and recovery.
Key points emphasize the significance of regular backups, familiarity with data recovery techniques, and recognizing the right time to seek professional aid. Being prepared is essential to prevent data loss. Regularly back up your data, implement data security practices, and educate yourself and your team on available data recovery solutions.
Welcome to Our Data Loss Prevention Guide
Data loss is a common risk that individuals and organizations face. By sharing this comprehensive guide with your network, you empower them to safeguard their data effectively and respond wisely to potential data loss scenarios. Let’s collaborate to minimize the repercussions of data loss events and safeguard our digital assets.

![VideoHive – Mobile App presentation [AEP] Free Download](https://i0.wp.com/crackgalaxy.com/wp-content/uploads/2024/07/VideoHive-Mobile-App-presentation-AEP-Free-Download-GetintoPC.com_-1-300x169-1.jpg?w=300&resize=300,300&ssl=1 "VideoHive – Mobile App presentation [AEP] Free Download")

![VideoHive – Mobile Application Promo [AEP] Free Download](https://i2.wp.com/crackgalaxy.com/wp-content/uploads/2024/07/VideoHive-Mobile-Application-Promo-AEP-Free-Download-GetintoPC.com_-300x169-1.jpg?w=300&resize=300,300&ssl=1 "VideoHive – Mobile Application Promo [AEP] Free Download")


Leave a Reply